Sunday, March 11, 2012
Binding Everything Together
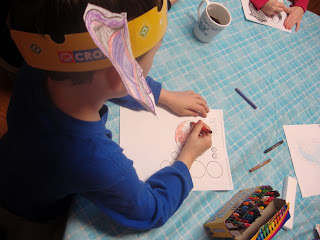
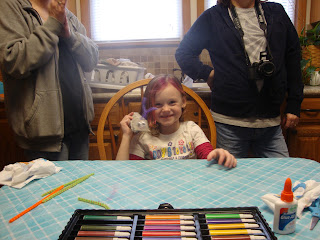
I made a book using all of the art work that the children made during the process of this Dr. Seuss art blog. I made this book using the bookbinder. I know that I had a really enjoyable time doing these art projects. I hope you had a wonderful time reading about my experiences with them. I want to encourage you to do some, if not all, of these activities with your children or children you know.
"Ten Apples Up On Top"
This Book is the same book but, the second picture was published under Dr. Seuss' real name Theo Geisel; except his last name is spelled backwards.
Materials You Will Need:
-Paint
-Paper plates or paint containers
-Apples cut into shapes (soaked in lemon juice so they don't turn brown)
-Paintbrush sponges (optional)
-Paper to stamp the apples onto
For this lesson I took apples and cut them into different shapes and had the children dip the apples into paint and then stamp them onto a piece of paper.
Below is a video demonstrating how to make apple stamps.
I took the picture of the book "Ten Apples Up On Top" from Google Images. I used an audio file and pictures as my technologies for this post.
"One fish two fish red fish blue fish"
Materials You Will Need:
-Construction paper or tagboard
-Glue
-Paint
-Paintbrush sponges
-Foam shapes for mouth (optional)
-Googly eyes
-Feather like material for fins (optional)
For the last art lesson I decided to do something from the book "One fish two fish red fish blue fish". I sponged paint onto the children's hand and made a hand print on the paper. After the hand print dried I let the children choose the materials they wanted to use to make their fish. I let them glue the items they chose for their fish anywhere they wanted.
Here is the end result.
I took the picture of the book "One fish two fish red fish blue fish" from Google Images. I used pictures as my technology for this post.
"Hop On Pop"
Materials You Will Need:
-Markers or Crayons
-Scissors
-Construction paper or tagboard
-Glue
-Googly Eyes
-small fuzzy colored balls
For this activity I printed out a template. You can find it HERE. I had the children color the bear template any color they wanted. After they finished coloring it, I had them cut it out and glue it onto a piece of tagboard. Once the bear was glued down, I gave them two googly eyes and a fluffy colored ball for the nose. I let them choose what color of ball they wanted to use for the nose. After they had chosen the nose for the bear they glued the eyes and nose on.
I took the picture of the book "Hop On Pop" from Google Images. I used a link to a website and pictures as my technologies for this post.
"Green Eggs and Ham"
Materials You Will Need:
-Egg cartons
-Pipe cleaners
-Googly eyes
-Scissors (to cut pipe cleaners)
-Glue
-Markers or Crayons
I printed off the "Egg Carton Critters" idea from this website. I showed the print out to both of the children and let them choose which critter they wanted to do. The first thing that we did was cut the egg carton into pieces. For example, the spider only needed one egg cup, so we cut out one egg cup. After the critter pieces were cut, the children chose the pipe cleaners they wanted to use for the legs. I cut the pipe cleaners into pieces for the children, as they are difficult to cut. After the children had their pipe cleaner legs, they glued the googly eyes onto their creatures. After all of that was finished they finally added the legs to their creatures.
I took the picture of the book "Green Eggs and Ham" from Google Images. I used a link to a website and pictures as my technologies for this post.
"The Lorax"
Of course I couldn't leave out "The Lorax".
Materials You Will Need:
-Pipe Cleaners
-Scissors
-Fluffy colored balls (for the tree tops)
-Play Do
-Foam piece (to hold trees up)
Again, I had "trial runs" and realized gluing the fluffy colored balls onto the pipe cleaners with a glue gun wasn't user friendly for young children. So I decided to go with UGG Glue Dots. We Put the glue dots on the place where the fuzzy ball and pipe cleaner met. Even with the glue dots the children needed help. After we had the trees put together I let the children put the Play Doh on the styrofoam piece, they had a lot of fun with this. The children really enjoyed this, and they ended up with some very colorful Truffula trees.
I took the picture of the book "The Lorax" from Google Images. I used pictures as my technology for this post.
Materials You Will Need:
-Pipe Cleaners
-Scissors
-Fluffy colored balls (for the tree tops)
-Play Do
-Foam piece (to hold trees up)
Again, I had "trial runs" and realized gluing the fluffy colored balls onto the pipe cleaners with a glue gun wasn't user friendly for young children. So I decided to go with UGG Glue Dots. We Put the glue dots on the place where the fuzzy ball and pipe cleaner met. Even with the glue dots the children needed help. After we had the trees put together I let the children put the Play Doh on the styrofoam piece, they had a lot of fun with this. The children really enjoyed this, and they ended up with some very colorful Truffula trees.
The finished Truffula trees.
I took the picture of the book "The Lorax" from Google Images. I used pictures as my technology for this post.
"The Shape of Me and Other Stuff"
The Shape of Me and Other Stuff, was my next reference for my art lesson.
Materials You Will Need:
-Construction paper
-Paint
-Paintbrush sponges
-Shape cut outs
-Tape
I used the Ellison Machine to cut out different shapes for this activity. I let the children choose the shapes they wanted to make. As always, they picked the color of paper and color of paint, they wanted to use. Letting them choose the color of paper and paint is important to them. Just make sure you have plenty of each color in case they want the same color. The children picked out the paper, paint, and shapes they wanted; after that they used the sponges to sponge the paint onto the shape. When they lifted the shape cut out they had an outline of the original shape. Looking back on this i should have laminated the shapes, then I could have tape them with double sided tape underneath. Live and learn, I guess.
I took the picture of the book "The Shape of Me and Other Stuff" from Google Images. I used the Ellison Machine and pictures as my technologies for this post.
Subscribe to:
Comments (Atom)


